扫码一下
查看教程更方便
在本章中,让我们创建一个简单的 flutter 应用程序来了解在 android studio 中创建 flutter 应用程序的基础知识。
第 1 步 - 打开 android studio
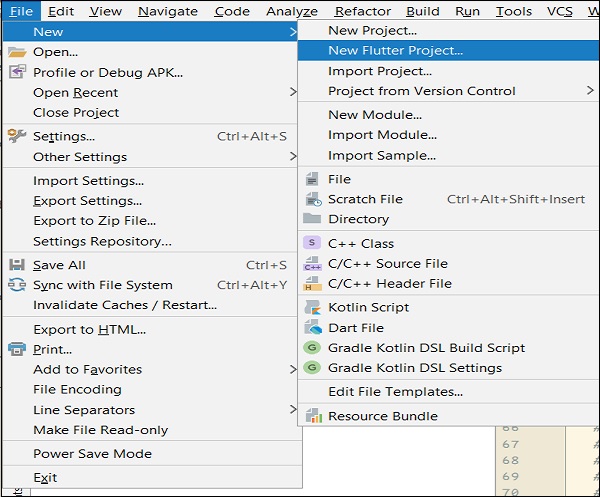
第 2 步 - 创建 flutter 项目。 为此,单击文件 → 新建 → 新建 flutter 项目
第 3 步 - 选择 flutter 应用程序。 为此,选择 flutter application 并单击 next。

第 4 步 - 如下配置应用程序,然后单击 next。
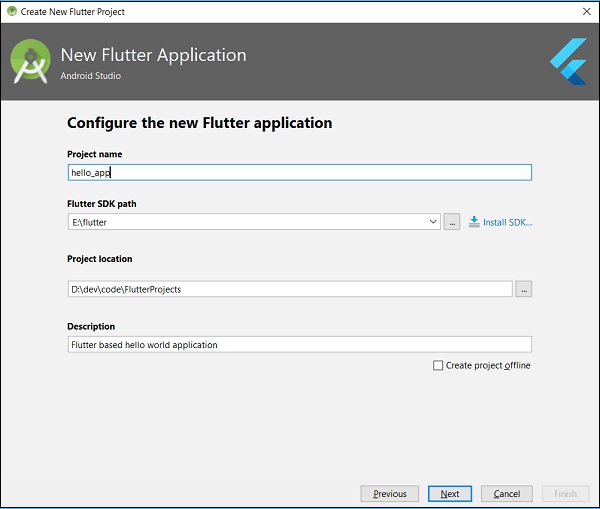
第 5 步 - 配置项目。
将 company 域设置为 flutterapp.jiyik.com 并单击 finish。
第 6 步 - 输入 company 域。
android studio 创建了一个功能齐全且功能最少的 flutter 应用程序。 让我们检查应用程序的结构,然后更改代码来完成我们的任务。
应用程序的结构及其用途如下

此处解释了应用程序结构的各种组件
第 7 步 - 将 lib/main.dart 文件中的 dart 代码替换为以下代码
import 'package:flutter/material.dart';
void main() => runapp(myapp());
class myapp extends statelesswidget {
   // this widget is the root of your application.
   @override
   widget build(buildcontext context) {
      return materialapp(
         title: 'hello world demo application',
         theme: themedata(
            primaryswatch: colors.blue,
         ),
         home: myhomepage(title: 'home page'),
      );
   }
}
class myhomepage extends statelesswidget {
   myhomepage({key key, this.title}) : super(key: key);
   final string title;
   @override
   widget build(buildcontext context) {
      return scaffold(
         appbar: appbar(
            title: text(this.title),
         ),
         body: center(
            child:
            text(
               'hello world',
            )
         ),
      );
   }
}
让我们逐行理解 dart 代码。
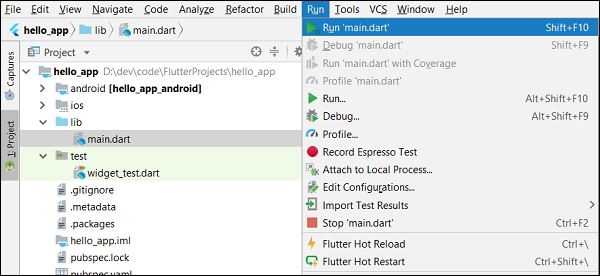
第 8 步 - 现在,使用 run → run main.dart 运行应用程序
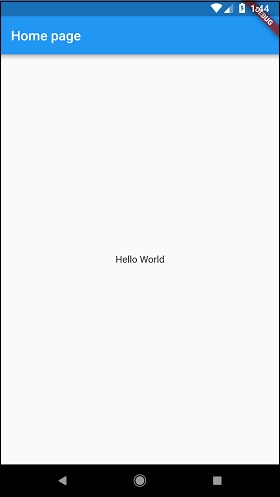
第 9 步 - 最后,应用程序的输出如下